File formats/Images
File Formats for Images Exported from Jmol
Saving images from Jmol application
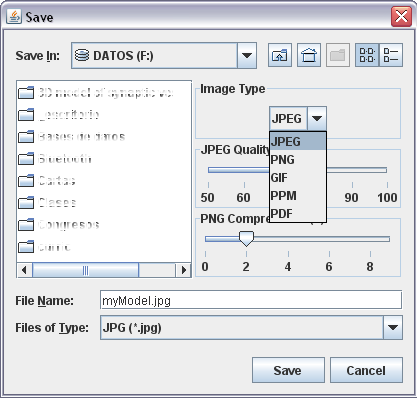
Images (snapshots) of Jmol's viewport, including the model in the current rendering, can be saved by using the application's top menu bar:
File > Export > Export Image
A dialog will open to allow choosing the location and filename, as well as the format in the Image Type drop-down list; choose among JPEG, PNG, PPM or GIF formats. There is also PDF format (one page with the captured image in the center).
Information on these image formats on Wikipedia.
- Note: GIF format is only available in recent versions of Jmol.
It is also possible to produce images that can be displayed and edited in ray tracing programs (see File_formats/Ray_Tracing).
Saving images from Jmol application and signed applet
The pop-up menu also allows in these cases (not in the normal, unsigned applet) to save a snapshot of the model, in JPEG, PNG, GIF or ray tracing formats. Open the pop-up menu (right-click, or Ctrl+click, or click on Jmol frank) and choose File > Save (or directly Save in older versions). After choosing a format, a dialog will open to choose the location and filename.
You can also export images using a script (e.g. from the console) with the write command (see the scripting documentation).
Saving images from Jmol applet
These methods work for both signed and unsigned applet, but for the first the method above is more convenient.
Basic method
Note: This only works for certain browsers, so it is not a general solution for the general user. In particular, it does not work in MSIE. In Firefox, it may fail for large applet sizes.
The command from the console or via JavaScript is
getProperty image.
The result is a base-64 encoded JPEG image that looks like this:
/9j/4AAQSkZJRgABAAAAAQABAAD//gBBSl...
Pop that into an <img> tag using Firefox or Opera (not MSIE), and you have
an image that you can copy into your clipboard and do anything you would
do with a JPG. The JavaScript required to create the tag looks like this:
var myImage = jmolGetPropertyAsString("image")
document.getElementById("someDiv").innerHTML =
  '<img src="data:image/jpeg;base64,' + myImage + '">'
Example: Bob Hanson's examples page (Just under the applet, click on the word "image".)
General method, using Perl
This works in any browser. The author must have access to the web server and be able to use a Perl script there.
It sends the "base64" encoded image (described above) to a perl
script on the server. This script uses the MIME::Base64 package to decode the image (MIME::Base64::decode($data)) and sends it back to the browser, embedded in an HTML page.
Example code:
HTML file and Javascript (client side):
<html>
<head>
<script type="text/javascript">
  function get_snapshot()
  {
    var BI = document.getElementById("bounce_image");
    var BI_D = document.getElementById("IMAGE_DATA");
    var BASE64 = jmolGetPropertyAsString("image");
    BI_D.value = BASE64;
    BI.submit();
  }
</script>
</head>
<body>
<script type="text/javascript">
        jmolInitialize("jmol/");
        jmolApplet(350,"load something.pdb");
</script>
<input type="button" id="snapshot" value="snapshot"
onclick='get_snapshot()'>
<form id="bounce_image"
     action="http://MY.SERVER.COM/cgi-bin/decode_snapshot.pl"
     method="post" target="_blank">
  <input type="hidden" id="IMAGE_DATA" name="IMAGE_DATA"
   value="empty">
</form>
</body>
</html>
PERL script (server side) file 'decode_snapshot.pl':
#!/usr/bin/perl
use MIME::Base64;
print "Content-type: image/jpeg\n\n";
    %postFields = ();
    read( STDIN, $tmpStr, $ENV{ "CONTENT_LENGTH" } );
    @parts = split( /\&/, $tmpStr );
    foreach (@parts) {
        s/%([0-9A-F][0-9A-F])/pack("c",hex($1))/ge;
        ( $name, $value ) = split(/\=/);
        $postFields{ "$name" } = $value;
    }
    $decoded = decode_base64($postFields{"IMAGE_DATA"});
    open (MYFILE, '>path_to_file/jmol_snapshot.jpg');
    print MYFILE $decoded;
    close (MYFILE);
    print $decoded;
exit;
It is also possible to add additional information to the page containing the generated image (like in the example below).
Example: http://www.fli-leibniz.de/cgi-bin/3d_mapping.pl?CODE=1deh (click on the "snapshot" button in the "Graphics Window" section).
General method, using just HTML, and PHP if necessary
This works in any browser. The server must support PHP, but no configuration is needed.
- No access to server configuration is needed (i.e., no need to install server-side scripts).
- If the browser is MS Internet Explorer, it needs online access to a PHP-enabled server that will return the image using a php page which is part of this package.
- If the browser is another, inline base64-encoded images will be used first (understood by Firefox and Opera, at least). This method works both online and off-line (e.g., from hard disk, USB disk or CDROM).
The image is opened in a new window, that fits the image size. It can then be copied to clipboard using the browser's pop-up menu on it. Some browsers also allow to save the image to disk, from the same pop-up menu.
Example and downloadable kit: http://biomodel.uah.es/Jmol/export-image/
Saving animated images
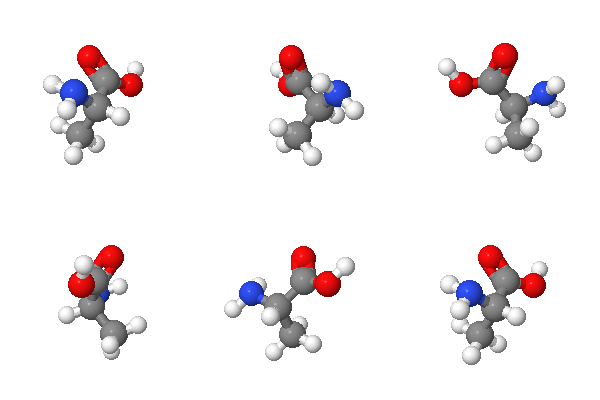
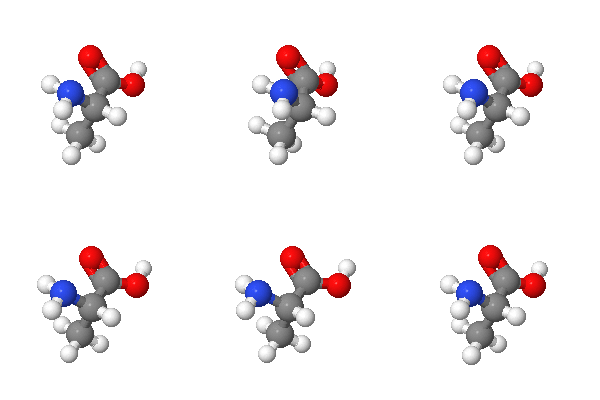
Animated images showing the model in rotation may be produced using the capture command, also available via the popup menu in both the Jmol application and the JSmol object (note, however, that producing these from the HTML5 modality of JSmol embedded in a webpage will take considerable time).
These formats may be generated:
- one animated
 gif file (examples displayed to the right)
 - a series of static
 gif files (which may be combined into an animated image using external software)
 - a series of static
 png files (which may be combined into an animated image using external software)
See the scripting documentation for details.
Here are some straightforward recipes:
- For a continuously spinning model (360° rotation), the number of frames produced is 12 × the value of
spinFPS; therefore you need to adjustspinFPSto nFrames/12, or 30/degreesPerFrame - For a rocking motion, the number of frames produced is 4 × the value of
spinFPS; therefore you need to adjustspinFPSto nFrames/4, irrespective of the amplitude of rocking (degrees). - After that, you will use the
capturecommand like this:
capture transparent "filename.gif" spin X
capture transparent "filename.gif" rock X 20
Y may be used instead of X (meaning the axis around which the rotation is performed),
and 20 (the amplitude of rocking) may be changed to another angle.
See also
File_formats/3D_Objects to export to VRML, X3D, Maya, OBJ, IDTF, U3D.
File_formats/Ray_Tracing to export to POV-Ray, Tachyon.


